The Upload Pipeline
All uploads pass through HESTIA's upload pipeline, where a series of checks are performed to ensure the data are correctly formatted.
The Refresh button at the bottom of the page can be used to reload the page so you can see the latest stage of your upload.

Refresh your page
On the right-hand navigator, as well as the upload pipeline, there is also a summary of file issues. Errors will appear in red, and must be fixed before your file can be uploaded. Warnings will appear in orange; they are not required to be fixed, but it is recommended that you double check your data to ensure that the information provided is correct. Both have descriptions that explain why the issue has occurred.
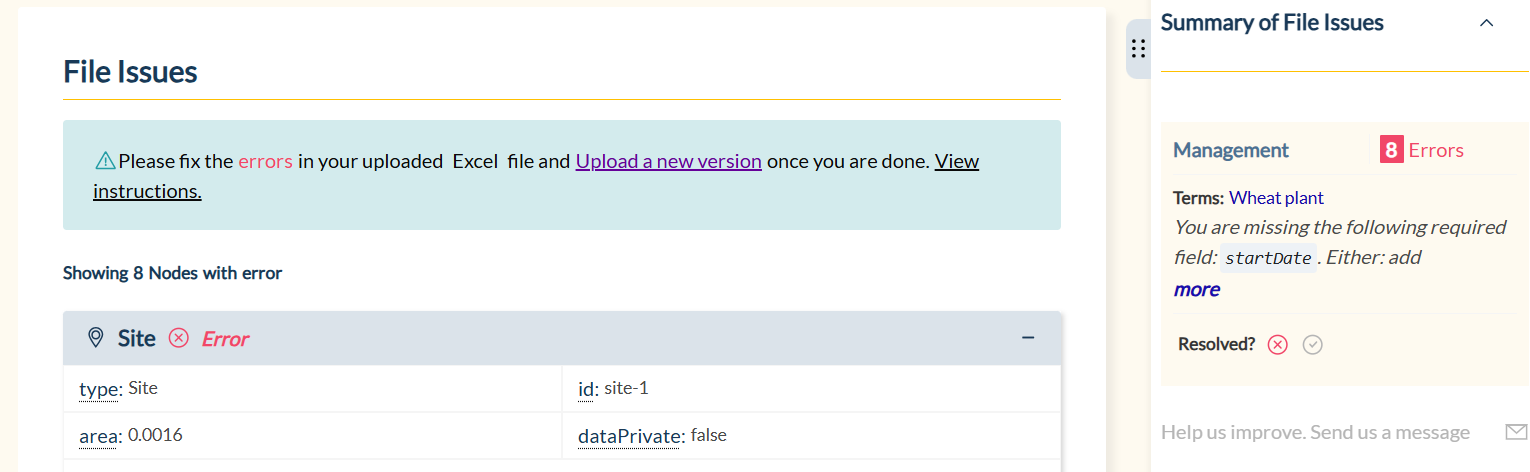
File issues
Clicking on an error or warning will take you to its location in File Issues. This makes it easier to see where in your upload something needs to be fixed.
Below is an explanation of each stage of the upload pipeline, with some examples of common issues that can occur. If you are unable to fix issues that appear in the pipeline, you can email us at community@hestia.earth for assistance.
Quality assurance
The pipeline below is the quality assurance applied to data entering the platform: automated validators, plausibility warnings where a value falls outside the range HESTIA expects, and — for every public upload — a review by a member of our team against the original source.
Quality assurance of the recalculated results is separate. Recalculated values are not reviewed by hand; the recalculation logs show the uploaded value next to the recalculated one so that any divergence is visible on the node. See Understanding the Recalculation Logs.
Data Compatibility
This step adds some fields to your data, e.g., default values, auto-generated fields like name, site area based on the boundary provided.
It also creates Impact Assessments for the Cycle products, where none have been uploaded, and copies the Cycle product into every Impact Assessment. A product with no Impact Assessment has no environmental impact calculated for it, so it is worth knowing which products get one: see How the Models Work.
Data Validation
sd of a value but not specified the statsDefinition.
This step checks the data itself against a range of validators on the HESTIA platform. Some could be fairly simple, e.g., you've specified a negative number as a value for an Input, and the value must be positive. Some can be more complex, e.g., ensuring the sum of tillage practices adds up to 100.
At this stage you can also see warnings for your dataset. Common warnings are that you haven't specified a tillage practice or the amount of residue produced for a cropland site, or that a value, e.g., Dry matter, is substantially outside our default value.
Values are also checked for plausibility here: a warning is raised when a value falls outside the range HESTIA expects. That range is based on HESTIA data where enough of it exists, and on default values otherwise.
Submission & Indexing

Once your file has been submitted, if it is a public upload it will be reviewed by a member of our team. They may leave changes in the Comment & Tasks section, which you will need to make before your upload can be indexed.
The reviewer checks the values in your upload against the original source, and flags anything unexpected. Every public upload goes through this before it appears on the platform.
Deleting Indexed Data
To delete data after it has been indexed on the platform, email community@hestia.earth with the identifiers or URLs of the nodes to be removed.